What is the way to customize Odoo POS Receipt?
Published on February 7th 2023
Here is a look of POS screen to give you a glimpse of how it looks:

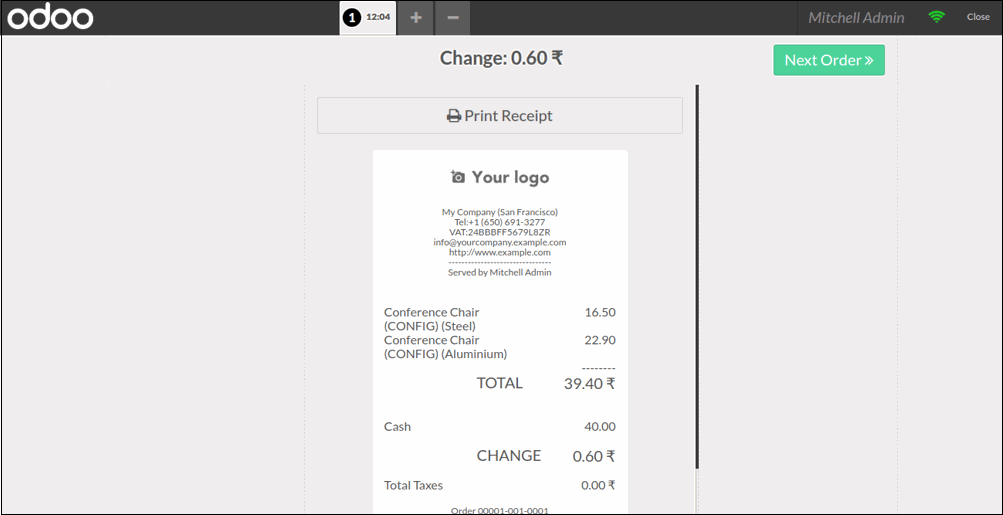
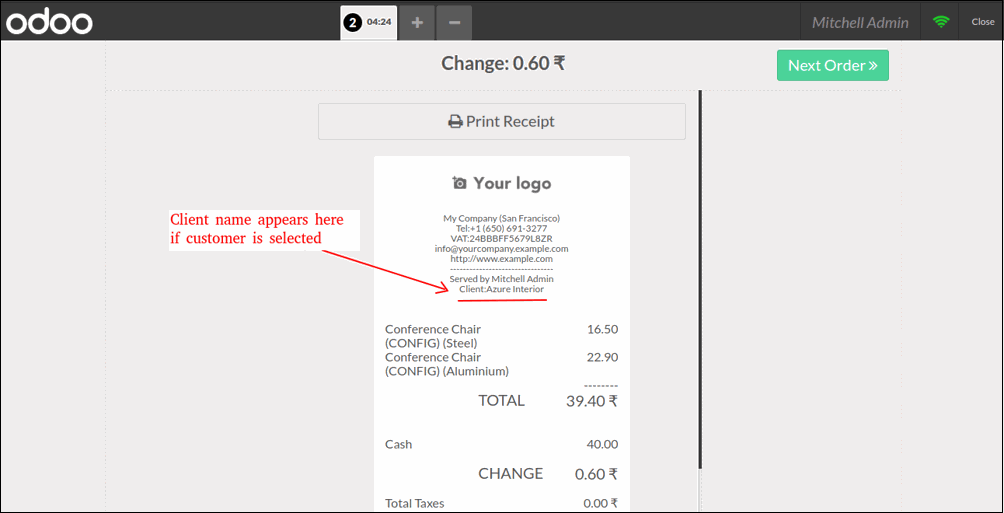
Here is another image that showcases the POS receipt or the bill receipt generated by this Odoo POS module.
Odoo offers you with a provision to customize this POS screen & the POS receipt according to our preferences.
We will briefly tell you the way you can customize your Odoo POS receipt.
Here is a list of some steps we are going to do for the POS receipt customization.
Foremost, Initiate the ‘point_of_sale’ module in Odoo by creating a custom module.
Secondly, navigate the template of POS receipt in ‘point_of_sale’ module in Odoo.
Last but not least, make changes to the POS receipt template.
Let’s dive deep into it:
Foremost, there is a need for inheriting the POS Receipt from the ‘point_of_sale’ module.
Here, we make use of a custom module for customizing the POS receipt in Odoo. Suppose, you don’t have any idea regarding the process of creating a custom module, you can read our below-mentioned post.
The template for POS receipt comes by default is also present on the ‘pos.xml’ file.
You will find the file in ‘point_of_sale > static > src > XML’ folder in the POS module. Before the Odoo 13 version, there used to be different templated for the receipt that comes up on the screen and the receipt that comes out of the printer.
When it comes to newer versions of Odoo, here you will get a single template for both. Here, you will inherit this template & make any custom changes in this template.
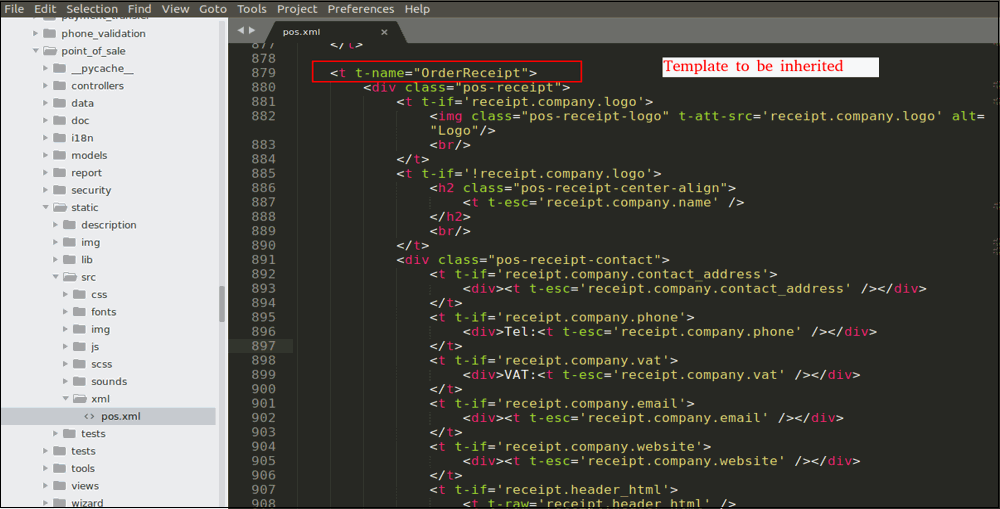
When we see the template, it is quite different from what we do in the inheritance of the qweb where you can use ‘’ to give a path for inheritance.
Now, you will have to make use of ‘’ to give the path of the template we are inheriting.
Last but not least, we will use ‘’ and ‘’ to make the necessary changes.
In such situations, you might have to change the POS receipt and add the customer's name to the POS receipt, only if the customer is selected at the screen for that order.
< ---- Code Starts ---- >
<?xml version="1.0" encoding="UTF-8"?>
<templates id="template" xml:space="preserve">
<t t-extend="OrderReceipt">
<t t-jquery=".pos-receipt .pos-receipt-contact" t-operation='append'>
<t t-if='receipt.client'>
<div>Client:<t t-esc='receipt.client' /></div>
</t>
</t>
</t>
</templates>
< ---- Code Ends ---- >
In this above code, you will find the things as follows:
-
templates id= “template” ; because we are inheriting the template record.
-
<t t-extend="OrderReceipt"> ; Extending the template ‘OrderReceipt’.
-
<t t-jquery=".pos-receipt .pos-receipt-contact" t-operation='append'> ; Here we will be mentioning the name of the class that we are applying operation on. In such situations, you have to inherit the ‘pos-receipt-contact’ class of the ‘pos-receipt’ class. Besides this, you need to mention the operation that is to be performed. Here, we will add the ‘client name’ to the ‘pos-receipt-contact’ class so we’ll use ‘append’.
- <div>Client:<t t-esc='receipt.client' /></div> ; Adding the Client name to the receipt.
Note: If you wish to change the overall layout of the POS receipt, you can do so by using operation ‘replace’ on the class ‘pos-receipt’.”
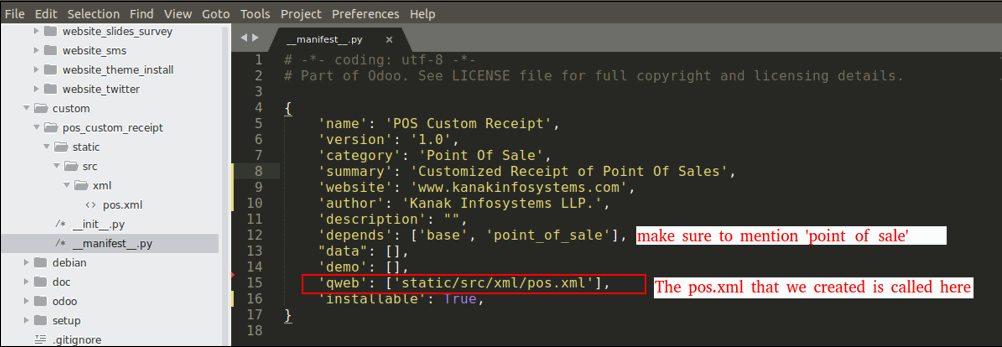
Once the XML file is done, it is time to make sure that the ‘__manifest__.py’ file is configured properly.
< ----- Code Starts ----->
{
'name': 'POS Custom Receipt',
'version': '1.0',
'category': 'Point Of Sale',
'summary': 'Customized Receipt of Point Of Sales',
'website': 'www.uncannycs.com',
'author': 'Uncanny Consulting Services LLP.',
'depends': ['base', 'point_of_sale'],
“data”: [],
'demo': [],
'qweb': ['static/src/xml/pos.xml'],
'installable': True,
}
< ---- Code Ends ---->
Once you are done with the ‘__manifest__.py’ file, your module will be ready to be installed. All you have to do is install the module and see if the POS receipt is inherited. Here, the client or customer name would showcase if there is any field added.
With this, you can easily customize the POS receipt in Odoo following these simple steps.

About Author