One of the most important modules of Odoo ERP is none other than the purchase management module. The purchase module is quite similar to the sales module, but serves different purposes. The purchase management system has a user-friendly interface especially for its users.
🔹With the help of this module, you can track all your supplier information, purchase details, and supplier details. The purchase management module offers you compact solutions to purchase with RFQ( Requests for Quotation). This module can be of great help in making quick decisions as details like previous order and supplier details are already there in the system.
How to Create a New Purchase Order?
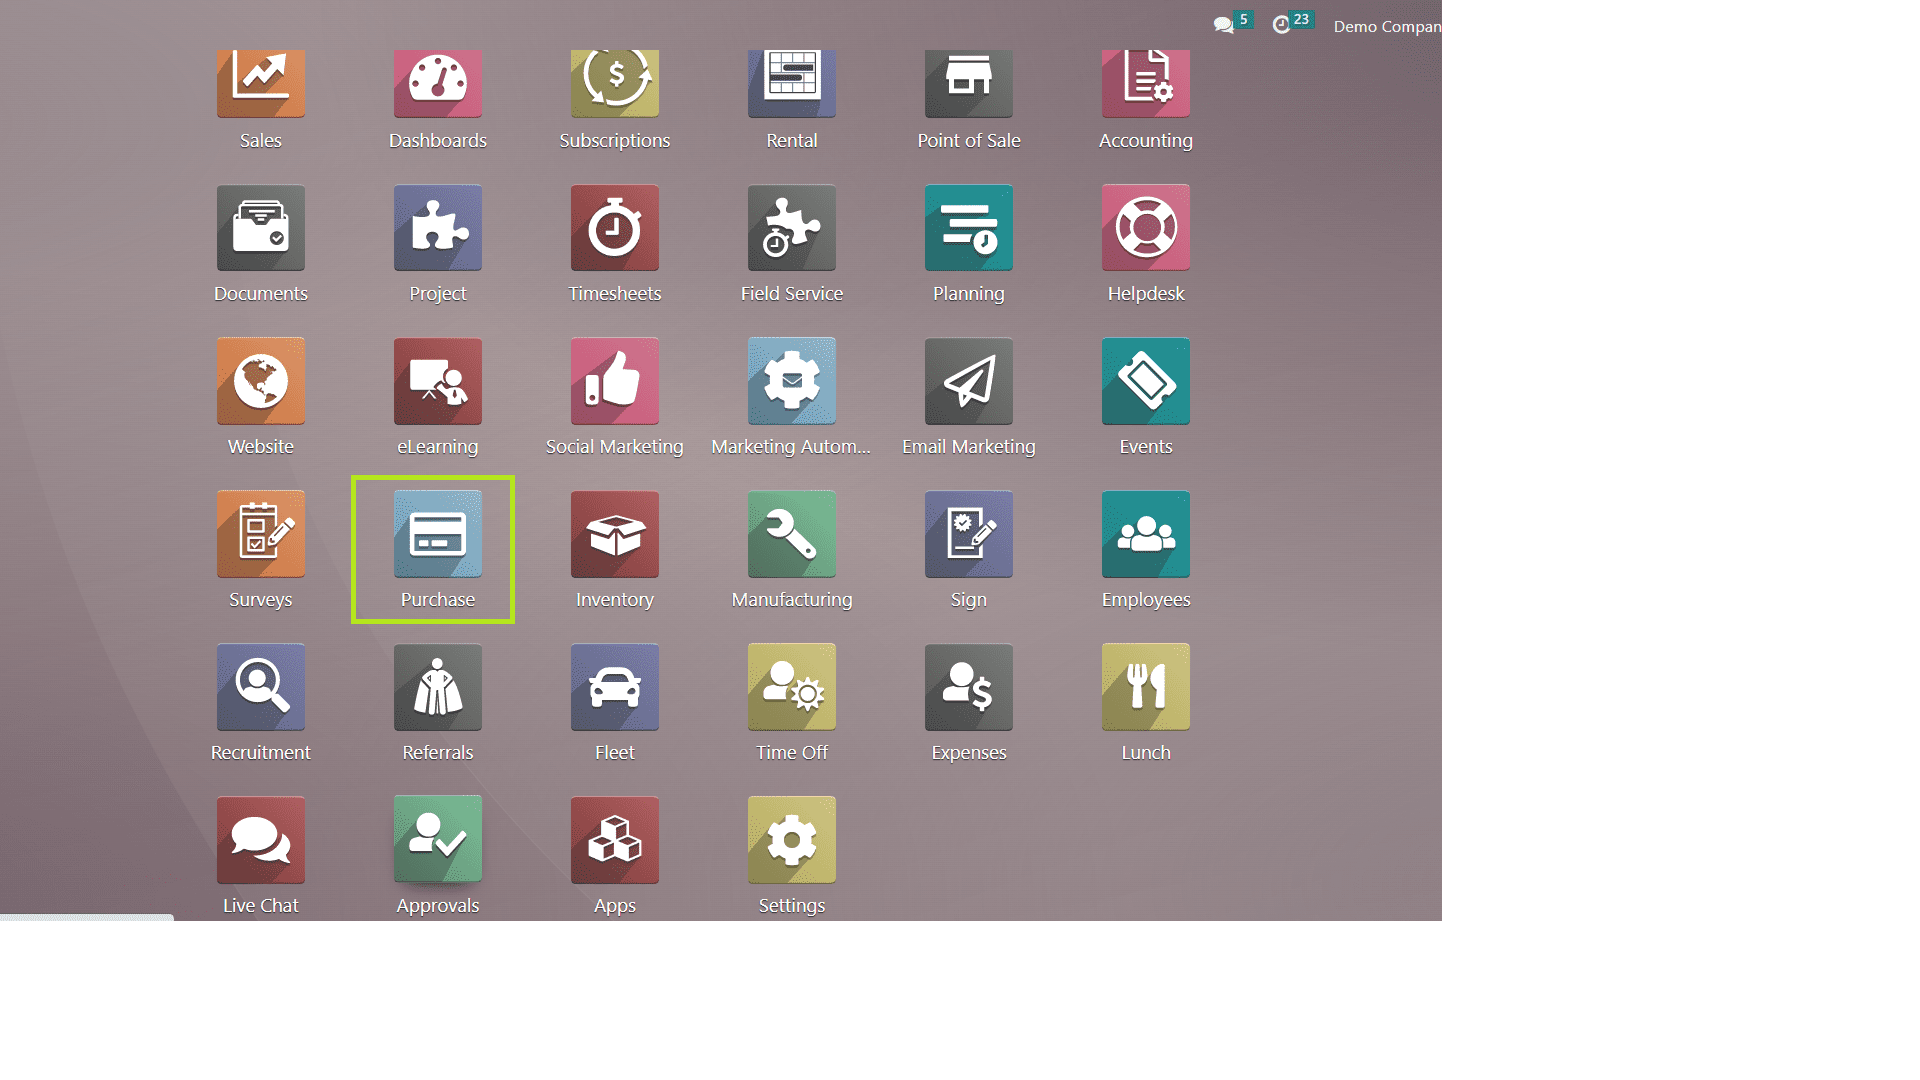
🔹First of all, you have to install the purchase module and then create new purchase orders. When you enter the module, it will open a configuration as seen in the screenshot below.
🔹Here, you will be able to see various purchase orders and related data in a list view. It provides you a quick view of the purchase order, average order value, and revenue generated.
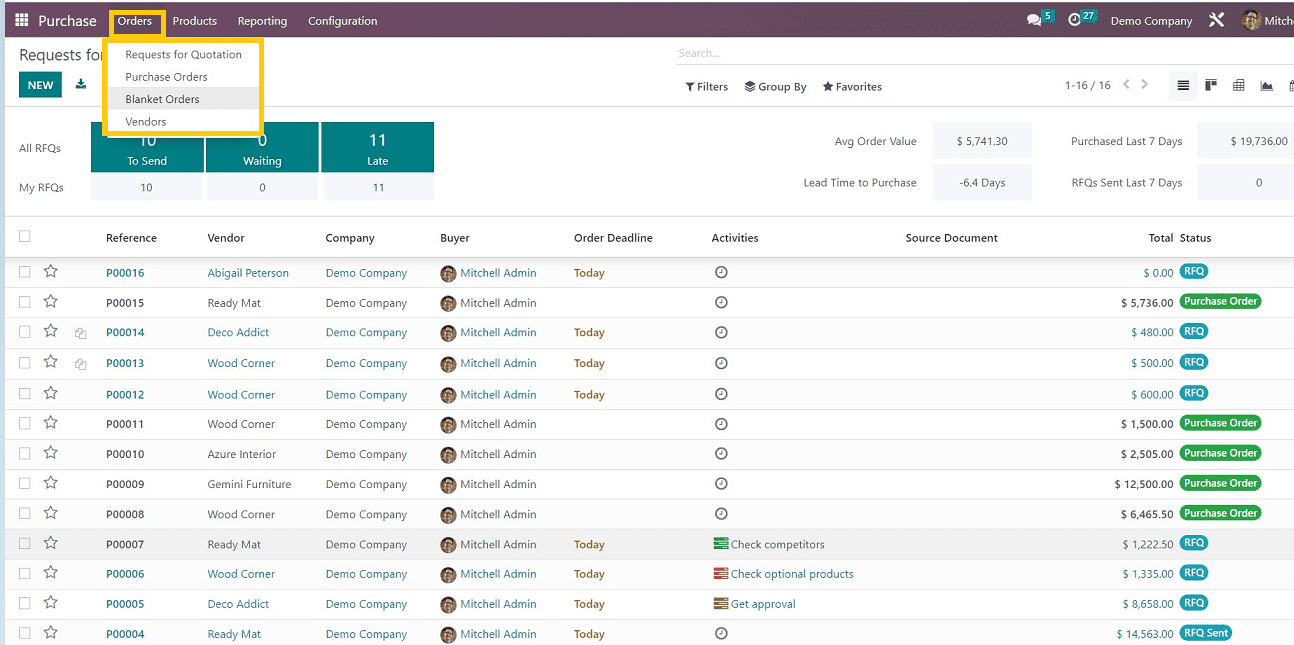
⟹For creating a new purchase order, select “Purchase Order” from the “Order” menu. You will see a form view as shown below.
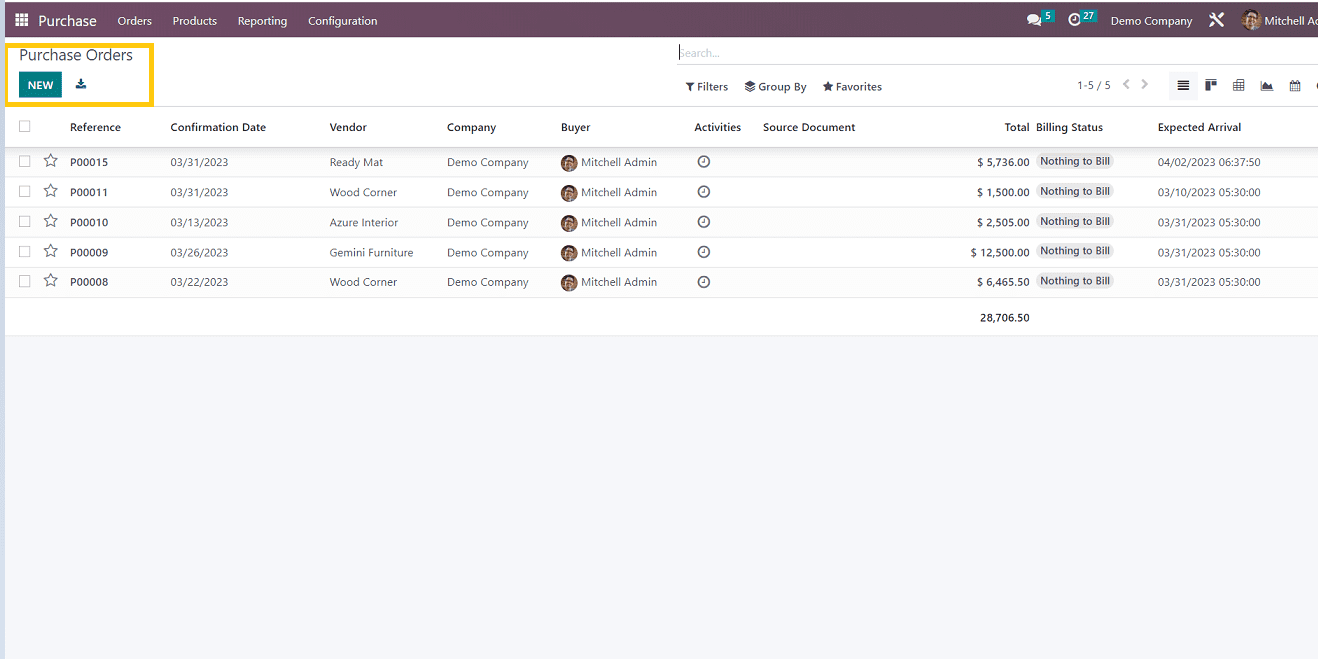
- Here, you will find a pre-existing purchase order list.
- For creating a new purchase order, click on the option. You will be redirected to a new page for creating a new order as per your requirements.
- Now, you will have to fill in the “vendor name.” This can be filled out from the existing customers included in the vendor section.
- As per your order requirements, you can choose from “Vendor reference,” “Order deadline,” and “Expected arrival date.”
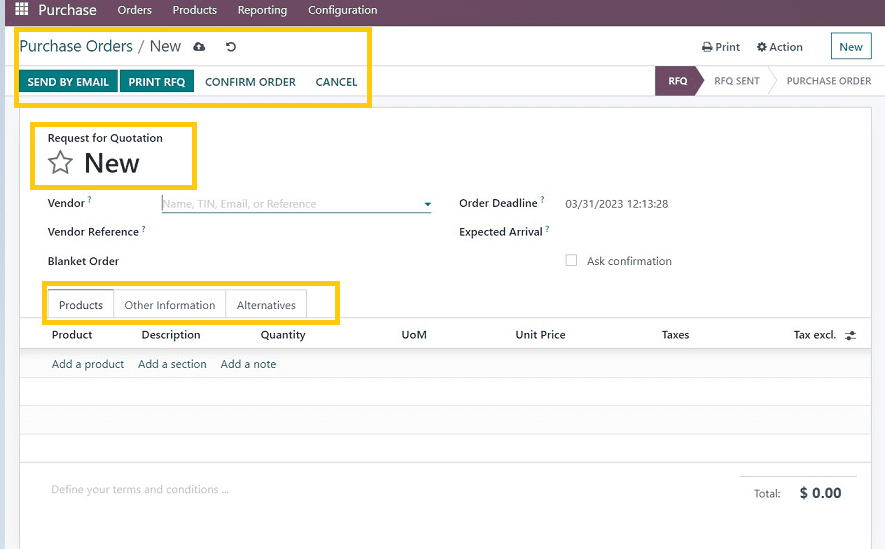
⟹Here, you will see different sections to fill out in our purchase order as follows.
- Products
- Other Information
- Alternatives
🔷Products section
⟹Here, you can manage every single detail of purchase management. When you are in the products section, all you have to do is add an item for purchasing. You can also pick it from the pre-existing section by choosing from the dropdown menu.
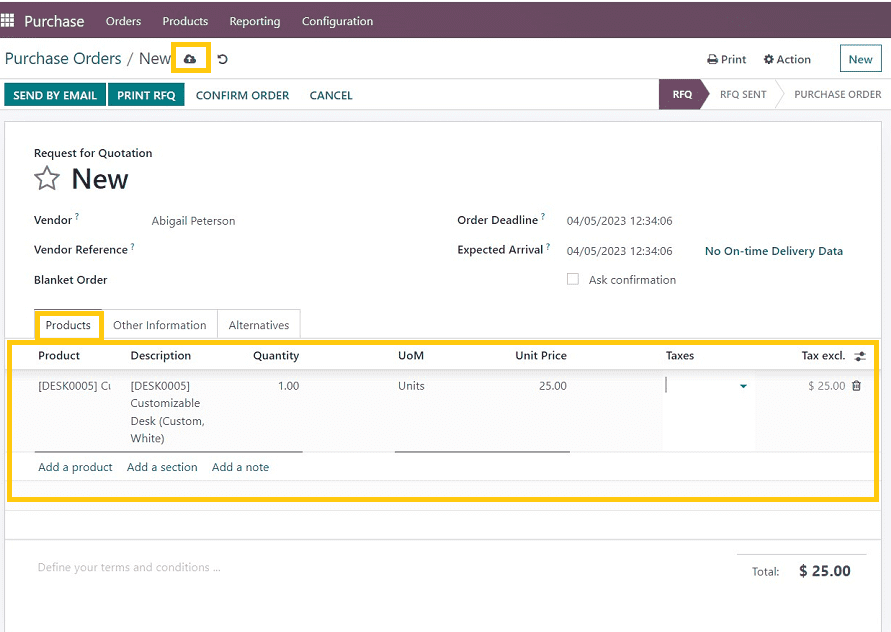
⟹In this situation, we have selected the “Customizable white desk” from the product dropdown menu. If you wish to add more items to the purchase order, you can do so by clicking on “Add a product” from the products dropdown section.
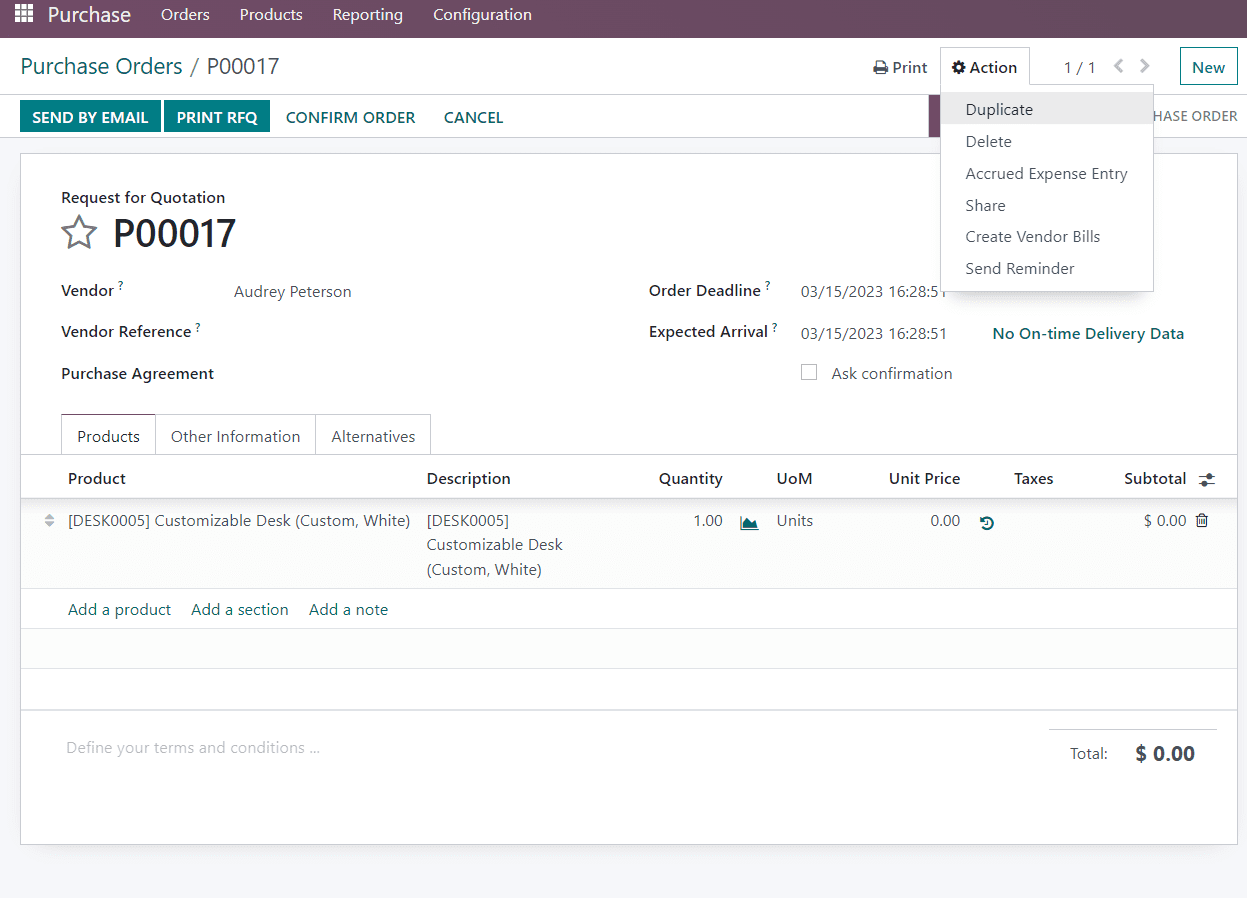
⟹After selecting the product, it is also possible to change the quantity and price per unit. For doing that, you will have to go to the ‘Action’ section. After that, select ‘duplicate’ from the dropdown menu. With this, you can edit the price and quantity of the item.
🔷Other information section
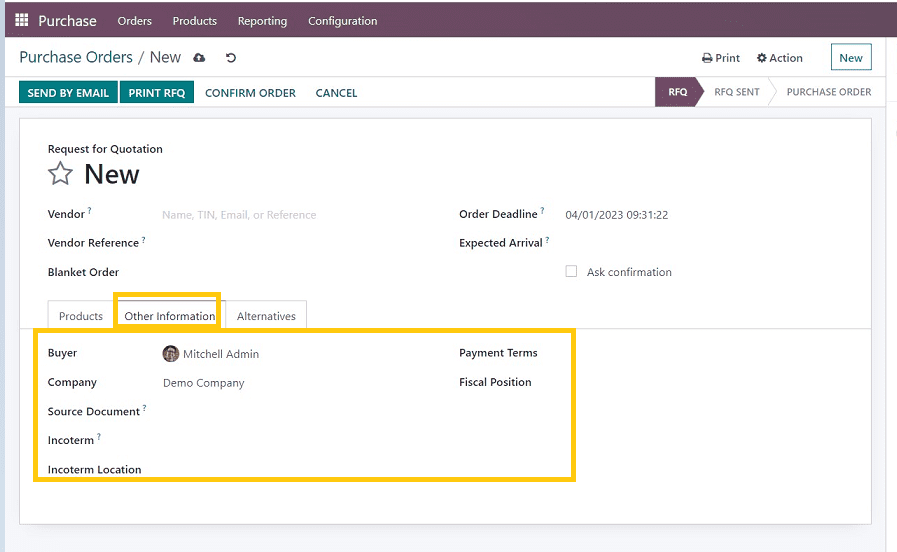
⟹Here, you need to add the company name, buyers name, payment terms, source document, and fiscal position.
🔷Alternatives Section
⟹In the “alternative” section, you can add alternative requests for quotes from different vendors for creating a call for tenders. Always make sure to pick the ideal lead time and total amount combination.
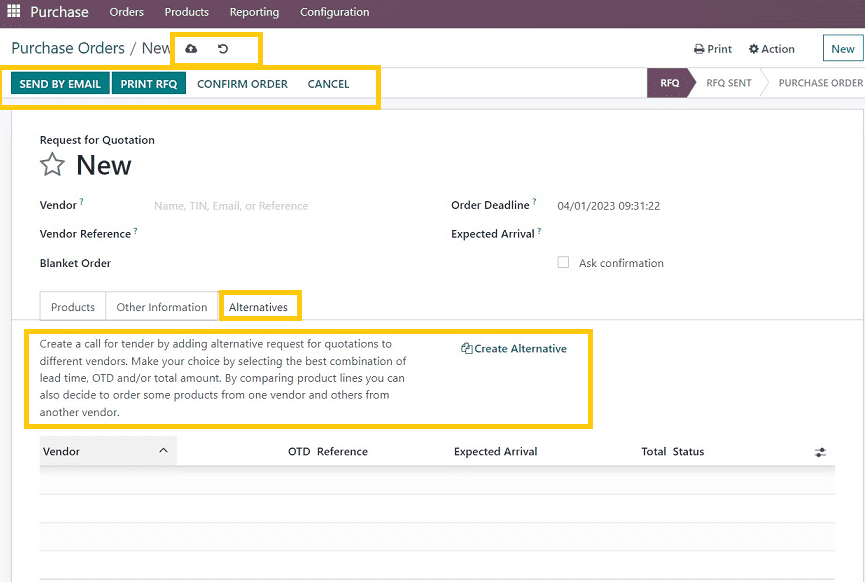
⟹As the order process is complete, it is time to save the details. You can also do so by sending an email about the purchase order to the vendor by clicking on the “SEND BY EMAIL” option.
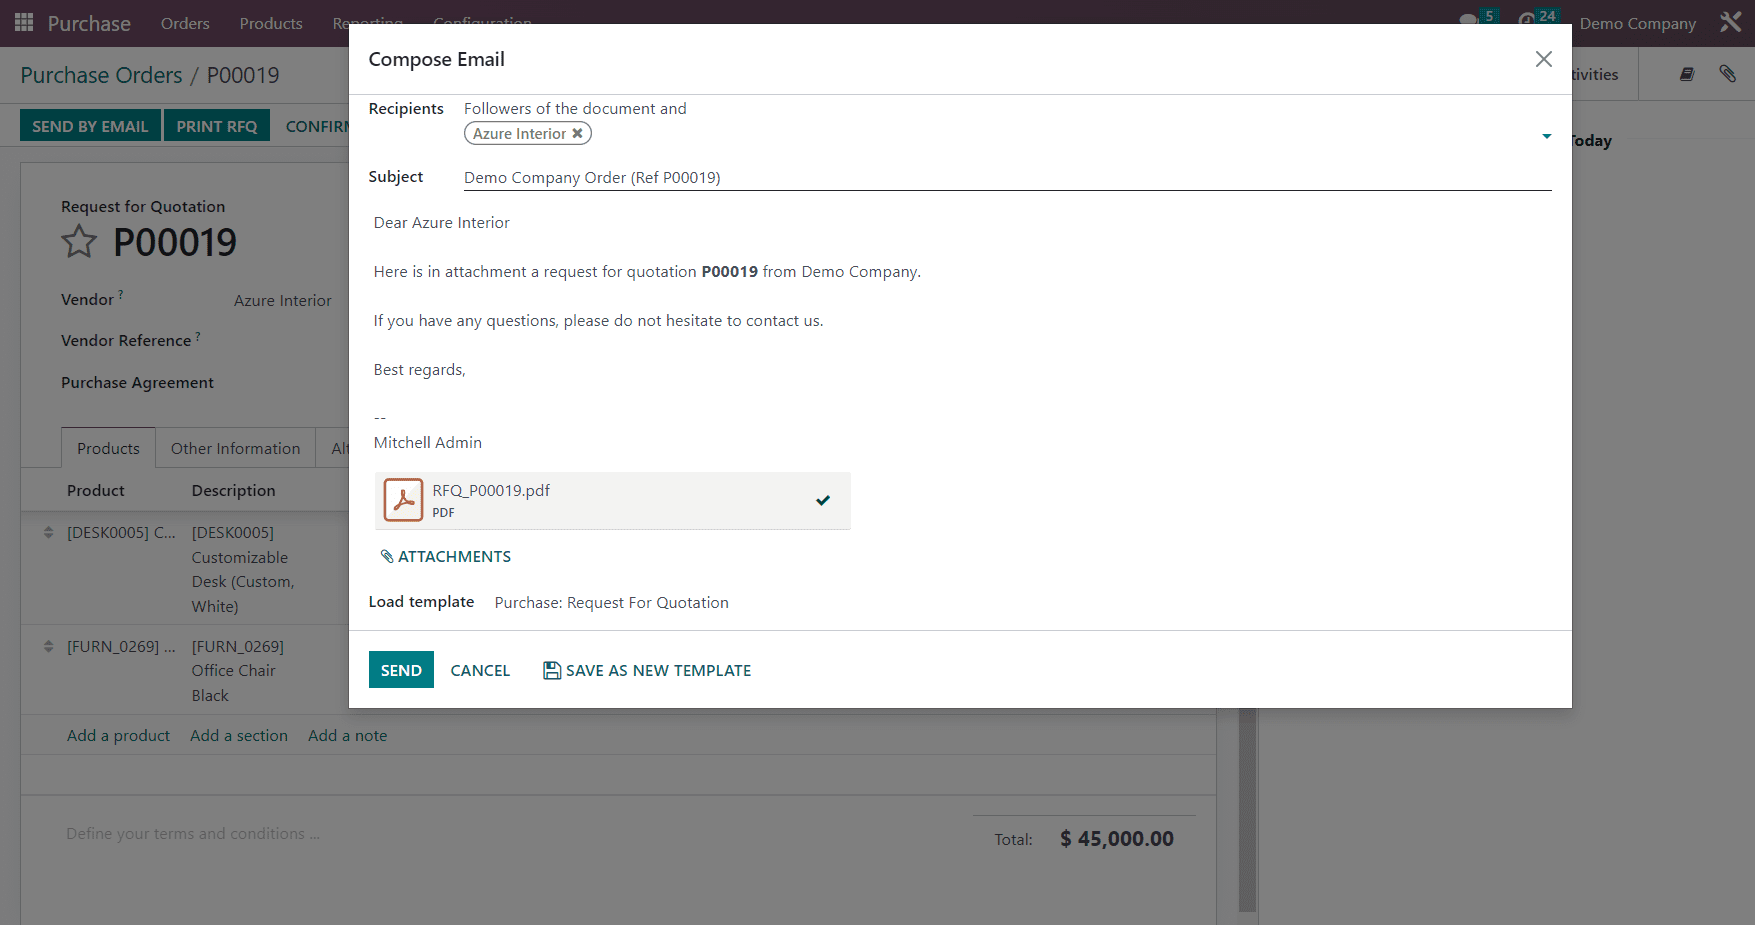
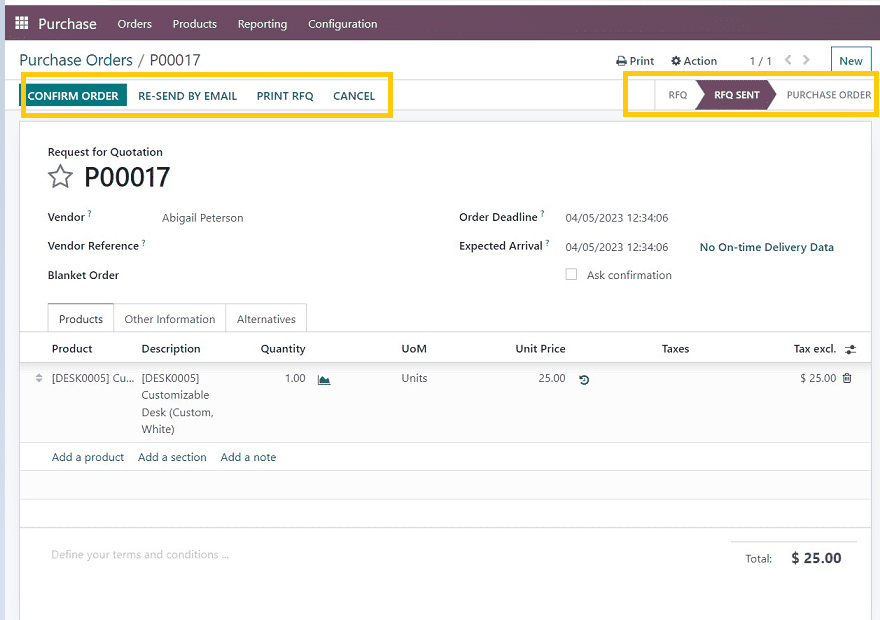
⟹Once the mail has been sent, you can confirm the order for validating the order process. Just a click on the “Confirm Order” button will work.
⟹Here, you will see that the order status has changed to “RFQSENT.”
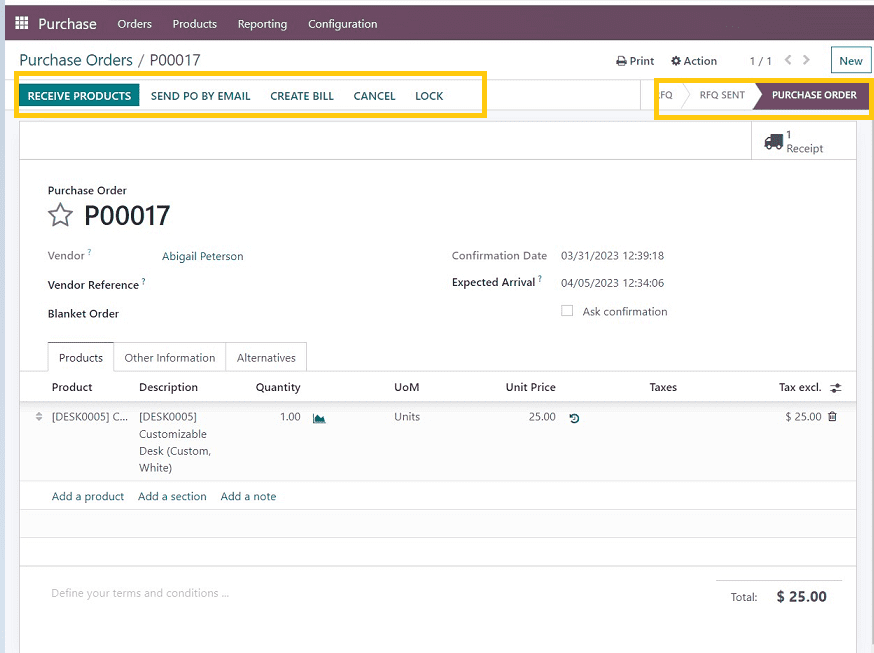
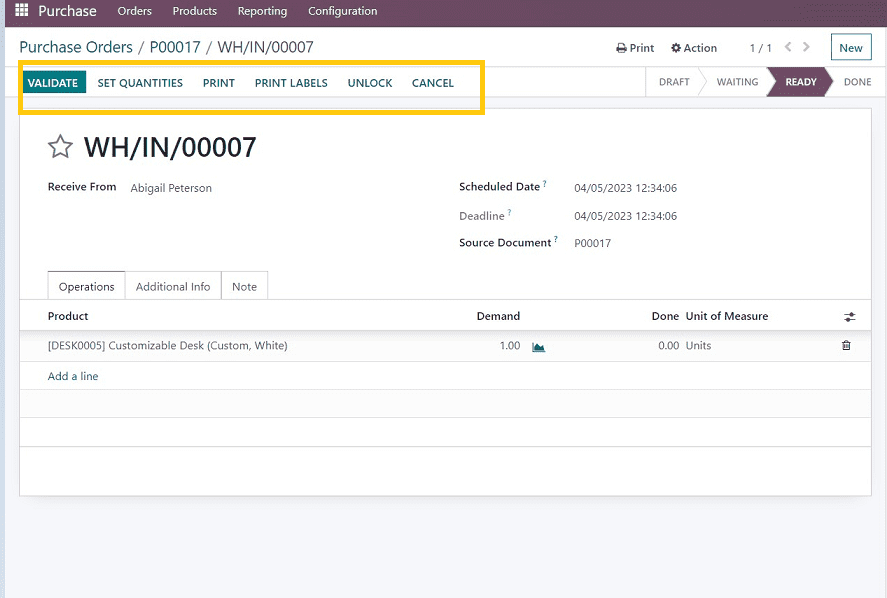
⟹With the Odoo 16 purchase module, you will be able to know when the order will be delivered. Once you get the delivery, click on the “Receive Product” button from the menu.
⟹Once the order has been purchased by clicking on the validate button, you can validate the same. Besides this, you can also set up new quantities and print labels from the menu as seen in the screenshot below.
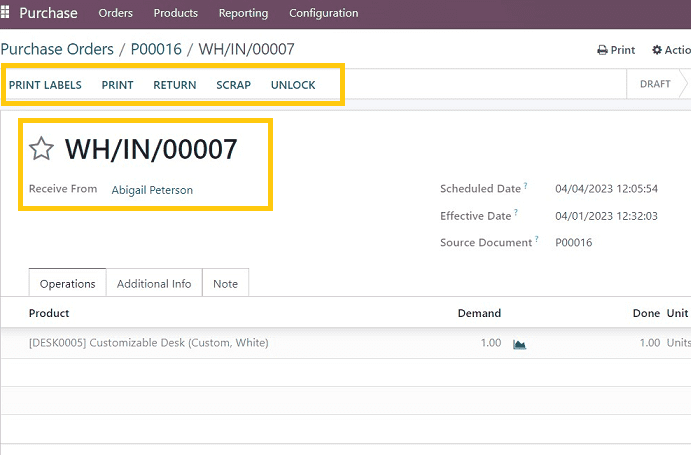
⟹When the product has been received, you can make use of the form menu for marking it as a scrap or to return it.
⟹Once this process is completed, users will be able to see their order status from the purchase order main menu.
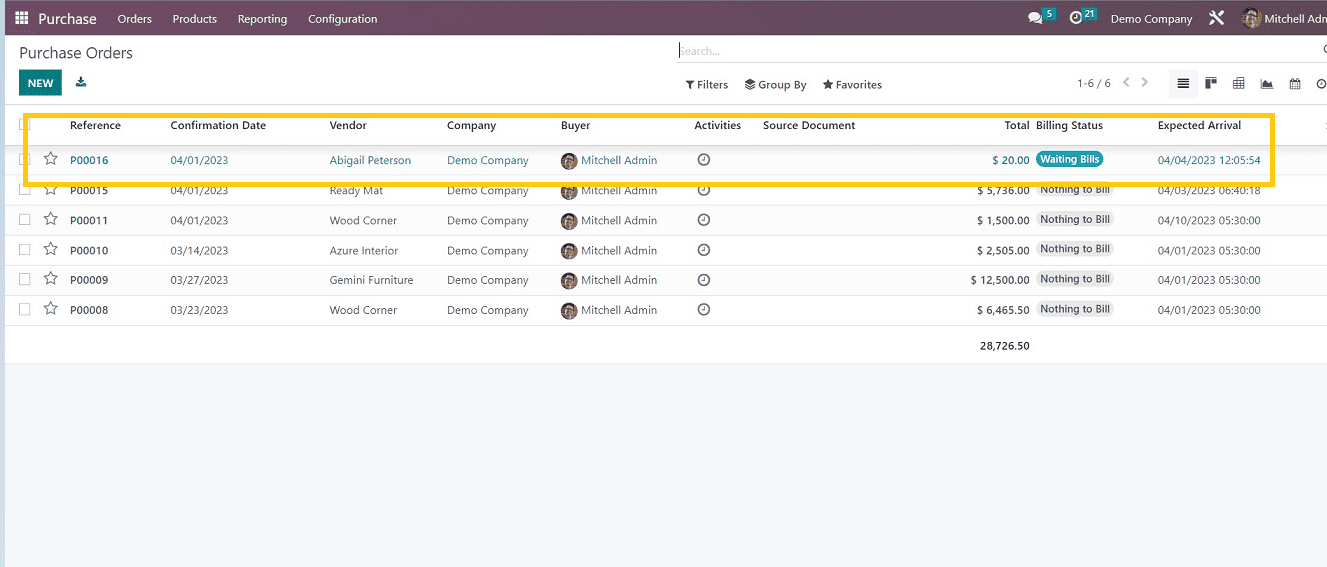
⟹Here, you can see that order status is “waiting for bills.”
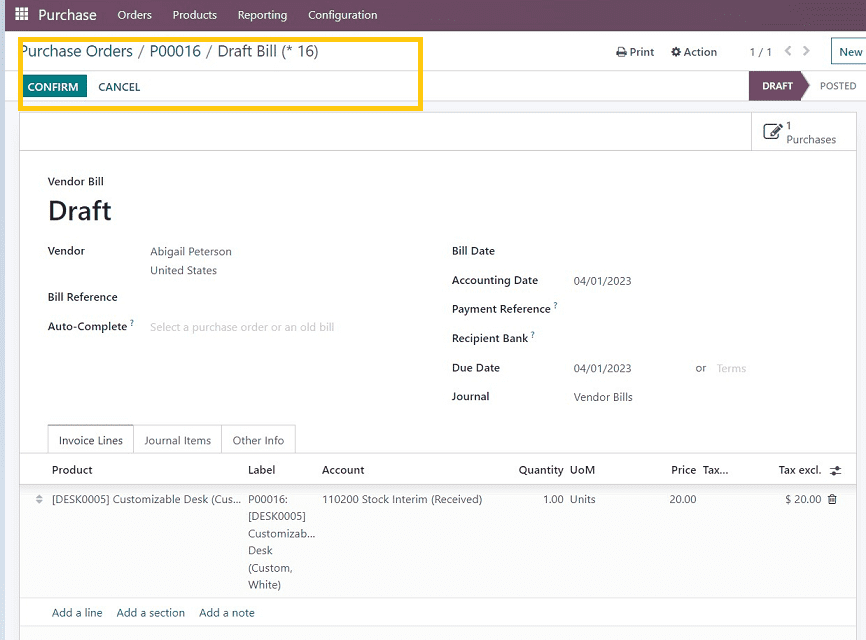
⟹By clicking on the purchase order list view, you can complete the entire billing process. After this, you will be redirected to the form view in which you can create a bill.
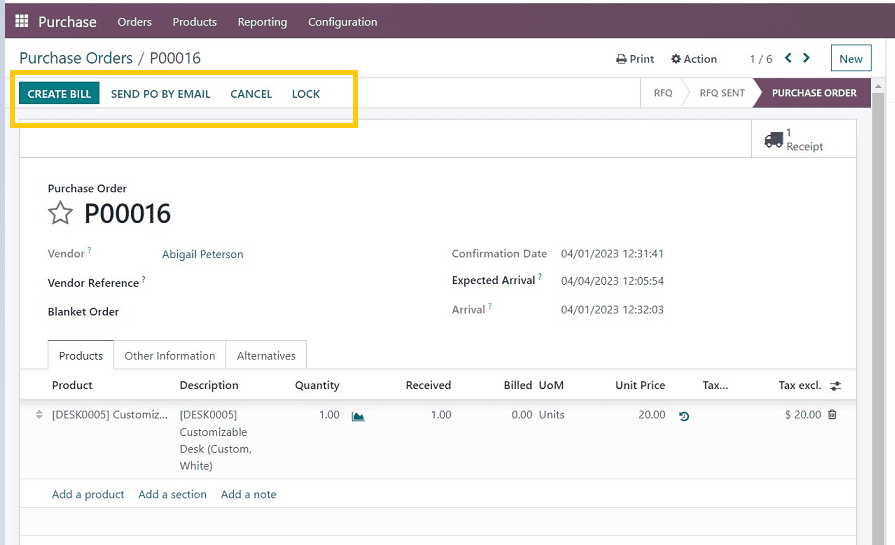
⟹By clicking on the “Create bill” button in the form menu bar, users can create bills. After that click on the “Confirm” button for confirming the billing process as seen in the screenshot below.
Conclusion
As you can see these were some of the basic steps for creating a new purchase order in the Odoo 16 purchase module. This platform is quite easy to use and also offers various features for creating and managing every aspect of a purchase order effectively.
We hope this blog will help you understand the entire process of creating a purchase order in Odoo 16 purchase module. If you have any questions or queries regarding this blog or topic, please feel free to share them in the comments.


